I was browsing to see see what sorts of henna kits are available for sale now (and of course to see where my page was in the engines) and I notice alot of kits offer the jaquard squeeze bottle, and some offer different tips.
I still use the plastic cone for henna, and the the cellophane cone for gilding. I make my own cones these days using 1 mil. plastic & a heat sealer. This way I can make the cone as wide or narrow as I prefer... and I know the seal will last. This method does create a seamed edge, but when filled with henna, twisted shut & sealed with a rubber band, I just turn the cone so that the seamed edge faces away from my client. The closeup photo below shows this.

I like it that I can roll the rubber band down the cone as I run low on henna. This helps me keep an even pressure on the paste, draw faster, cleaner lines and best of all... no hand cramps!
An extra advantage is that if I make too many cones, or just have a bit of great paste left over, I can wrap the henna cone in plastic wrap, tuck it into a freezer bag, freeze it, and then have henna for that "Oh I just need a quick design" moment that seems to happen in the summer.
Currently I offer two cones in each of my Artists Henna Kits. The cones are washable and reusable. I cut a very littel bit off the tip of one cone for finest lines, and cut more off the second cone to have the broad tip for tribal patterns & bold henna tattoo.
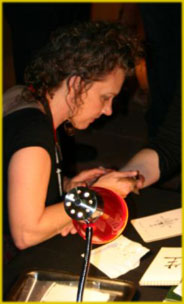
If you would like to see more photos of a henna artist at work.. visit this slide show from a Saturday at the Midnight Sun.