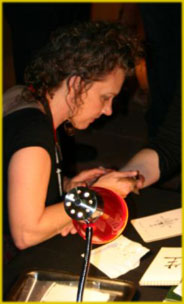
This is a fine example (un-retouched) of a good henna stain. As is always true, the best color is achieved on the palms of the hands.
The palm is the most porous and fleshy part of the tattooable body. However, the kind of color that you see in this photo occurs when the finest quality paste is used.
Recently, shoppers buying boxes of henna at Midnight Sun have asked about the process. They wonder what to do with this box of powder.
To be helpful, I have published a basic henna paste recipe on my site. It is not the recipe I am using this year, as I have perfected the basics to get a paste that I like very much. It is easy to apply, takes to the skin very well, and gives a good read color even on the back of the hands.
Important things to know about making a great paste are:
- It takes two days preparation to get the very best paste. The first day you mix the henna with lemon juice. I use lemon juice and a special tea composed of spices, herbs, flowers and other ingredients to help the henna stay to the skin and of course to give the darkest color possible. The second day you add the essential oils.
- You get the best henna paste in the spring or summer time. Why? Because you can put the henna in the sun. Henna is a heat activated dye. Heat is required to get the powder to release the day. (As well, heat helps the paste cure in the skin.) I put my paste in a metal bowl, cover it with plastic wrap, put that in a sealed bag, and set it on the porch. The bowl is covered to prevent the paste from drying out.
- It is important to make the paste thin enough so that it is easy to work with. A more liquid paste handles well, and it penetrates the skin better.
- I use a plastic cone to apply the henna. The squeeze bottle becomes difficult to work with overtime. You may cut off the tip of the cone to create the smallest opening that is possible for a good henna flow. If a line is too thin, you can go back over it. If a line is too think, there is not much to do about that as a good paste will begin to stain instantly.
- It is wise to invest in a good collection of essential oils. I have at least 6 that I use on any given paste. They include: cajeput, lavender, geranium, basil, cardamom, clove, neroli, tea tree, and... one or two more. You can visit different site to see what kinds of oils other artists use.
- I prefer henna powder from Henna Sooq at this time. I have used others, and there are many fine providers, but I am having excellent results with a combination of three powders from that company.
In short, I have been working to make the a good henna paste for over 10 years. I have learned a good deal in the process. I encourage you to enjoy the journey. I do not recommend using premixed henna cones from a local store. If you want to buy henna cones already made to use, then visit a site that sells you fresh/frozen henna and ships it via Priority Mail.
Hoping you found this post helpful.
Namaste.


